Friday, December 14, 2012
uh oh...
I'm sure you can navigate your way towards Christmas without me... Please forgive the lack of posts... I am DREADFULLY sick at the moment. It is all I can do to drag my butt out of bed to drink more orange juice... I have no voice, and am averaging about 5000% of my recommended daily vitamin C every day... I can barely manage to get actual real life Christmas stuff done, let alone find some time to write and post pictures about it here... So I'm sorry... But MERRY CHRISTMAS!!!
Tuesday, December 11, 2012
14 days til Christmas!!!
2 weeks left!!! How are your Christmas preparations going?
We don't even have a tree up yet! Just my re-vamped wreath... I put battery opperated lights on it and a little blue-jay bird I found at Michaels, and it is adorable.
My main reason for not having a tree up yet is because of our new additions:

We don't even have a tree up yet! Just my re-vamped wreath... I put battery opperated lights on it and a little blue-jay bird I found at Michaels, and it is adorable.
My main reason for not having a tree up yet is because of our new additions:
 |
| Kitten sleeping on Ava's tail |

 |
| doesn't she look like a tiny little bear with a cat-head? |
Meet my new kittens! One has a tail, and one doesn't. (Their mom is a Manx... and who knows who their dad(s) is/are... )
My parents live at the end of a very quiet no-exit road... and kittens get dumped there all the time... The lucky ones end up finding the house and get fed during the winter, and the not-so lucky ones probably end up as Coyote food... These two are the super-Lucky ones because I cat-napped them (the only two I could pick up) and now they get to live inside with fresh food and water all time.... And Just quickly-before I go on... We (my parents and myself) have chosen to take care of the semi-feral and feral cats rather than just dump them into the already flooded animal rescue organization in our small town... So If you live in central alberta or around Calgary, and would like to rescue one of our cats... send me a message on here... Because these kittens are adorable and deserve loving homes, not to be thrown out like garbage.
So... one kitten has a tail, and one doesn't. (Their mom is a Manx... but obviously a regualar-tailed cat has umm.. "serviced" her too.)
The kittens love the dogs, and the dogs love them. And it only took about a day for them to all settle in together, which was a nice surprise, I expected it to be about a week (since they are semi-feral afterall).
We finally named them (after calling them Tail and No-tail for about a week). So now... The one with a tail is "Hali" and the one without is "Ekki"... (we typed "no" and "tail" into google translate and tried different languages until these came up in Icelandic... So Ekki means "no" in Icelandic and "Hali" means "tail" which I find very humours)
Back to regular Christmas posts tomorrow... I just needed to share the cuteness!!!!
Monday, December 10, 2012
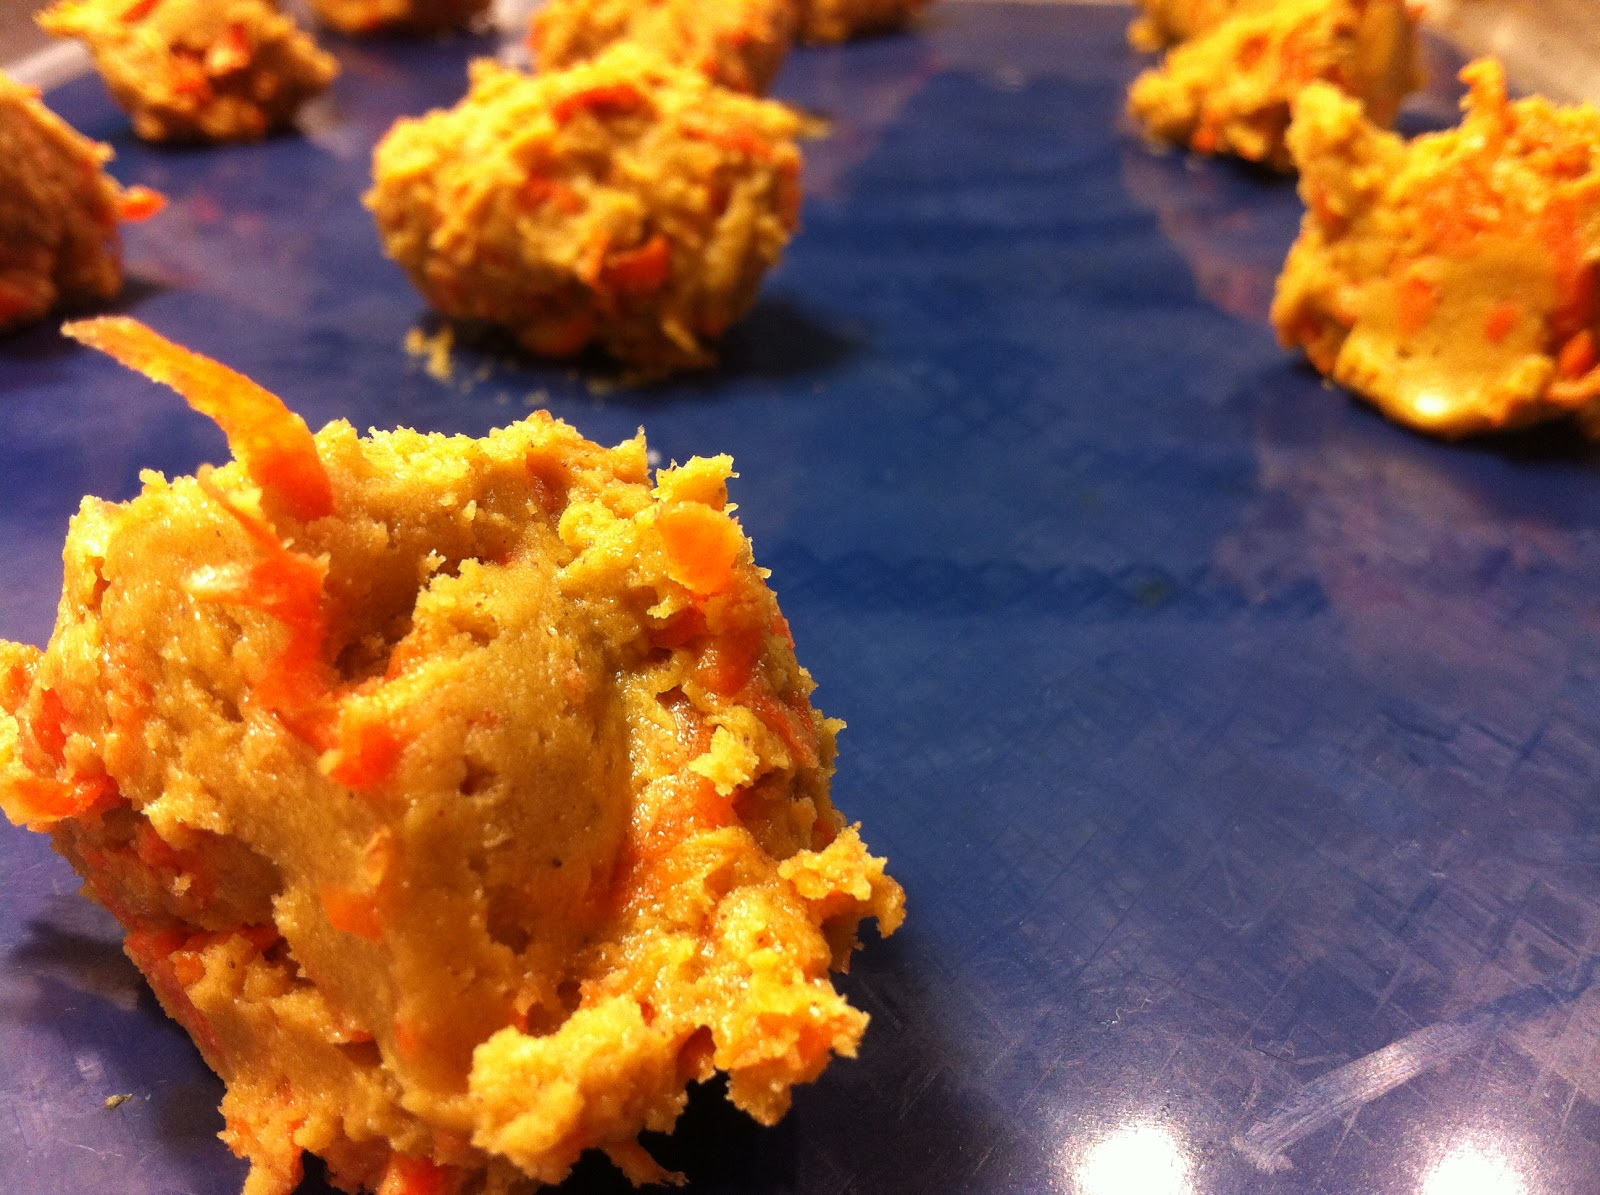
15 days til Christmas... Carrot Cookies

These Cookies are like delicious little bites of Carrot Cake... Everytime I make them they are a huge hit, and the best part is that they are so easy!
1/2 cup Butter
1 Cup Brown Sugar (lightly packed)
1 egg
1 1/2 cups grated carrot
2 cups flour
1 tsp. Baking Powder
1/2 tsp. Baking Soda
1/4 tsp. Salt
1/2 tsp. Cinnamon
Cream Butter and Sugar
Beat in Egg
Stir in carrot
In a separate bowl, whisk the remaining dry ingredients together and then add to the wet ingredients.
Mix well
Drop by spoonfuls onto greased cookie sheets
Bake at 350F for about 10-12 minutes
(Makes about 3 dozen cookies)
For the glaze, just stir together some icing sugar with either milk or water... add some lemon juice or orange juice or cinnamon or whatever your heart desires and tastes good to you (before you drizzle on the cookies... taste it)... You want it thick enough to stay where you put it, and liquid enough to flow freely, either through a piping bag with a small round tip, or a ziploc bag with a small hole cut ino the corner (but cut the hole after you fill it)


Sunday, December 9, 2012
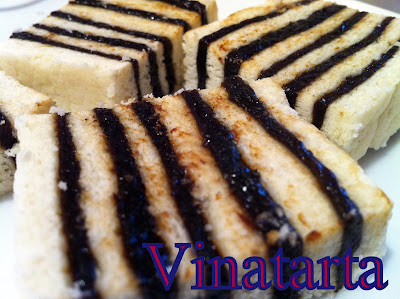
16 Days Until Christmas - Vinatarta! (re-post)
ORIGINALLY POSTED NOVEMBER 26, 2011! (Re-posting for Christmas 2012, Because I don't want to re-write the whole thing, since I already did it last year... AND because it is the most popular post on my blog! So Here it is: minimally edited from last year when I wrote it:)
You might be thinking: "Vina-whata?"
I don't really know what you are thinking, because this is the kind of thing that you either like, or don't... Unless you are like me, and at 6 years old, thought it was the most disgusting thing disguising itself as a Christmas cookie, Then waited until you got older to try it again and loved it... I have come to the personal conclusion that Vinatarta is not a kid's ideal Christmas food. It has prunes in it... According to my 6 year old brain... prunes make you poop... Who wants a Christmas cake that makes you poop, I mean really... well, unless you can't, and you really need to, then maybe you want to just eat prunes
Ok, so far, this post is not going so well, I am talking about poop and Christmas cake together... way to sell it....
Vinatarta is an Icelandic Canadian thing... Back in the late 1800's when a vast majority of Icelanders came to Canada, This was their dessert (Obviously, they had other ones, but this one is distinctly Icelandic... well, Icelandic-Canadian if we want to get specific). My great grandparents, were in this group, and my grandpa, and then my mom, grew up with this. It is a tradition of sorts to make Vinatarta at Christmas.
Because I haven't really liked it until now, my mom never really made it, and my great grandma's recipe was lost to us. So I had to scour the internet, and I came across a few recipes that were all very very similar. I printed off a few and then last weekend, when I went home to visit, we made Vinatarta from our own recipe adapted from the few I found on line.
Want to know what makes our Vinatarta the best? Rum... Because rum is good, but you could be boring and easily just use water too.
There was a recipe on Swerve Calgary... But the one we used was closer to the one that is posted in the comments section of that same article. Only with rum.... and probably a little more cardamom because my Mom likes it.
To make the cookie/cake layers:
1 cup butter
1 1/2 cups sugar
2 large eggs
1 tsp. baking powder
4 cups of flour
3 TBSP heavy cream
1 tsp Almond Extract
1 1/2 tsp. Cardamom
Cream butter. Add sugar, and beat well. Add eggs, one at a time. Beat Well. Add Almond Extract here also.
Sift the dry ingredients together. Add to the wet, alternating with the Heavy Cream (starting and ending with the dry). Knead well. Divide the dough into 5 or 6 even balls (depending on how many layers you want... we do 6). Spread each ball onto the back of a round cake pan. Unless you have 6 round cake pans all the same size, you will have to work in batches... We did 2 at a time. Let the cake pan cool down a little before you spread the next layer on.
Preheat the oven to 375 F. Bake about 10 minutes. Keep a close eye, and remove from the oven when the edges are starting to brown.

To make the Prune filling:
Place, approx. 1 pound of dried, pitted prunes in a large saucepan. Just barely cover with water (this is where we used rum... mixed with water, we would've had to use the whole bottle... just use to taste if you choose). Simmer until the prunes are soft.
Purée in a food processor (use water/rum) if you need more liquid to get the processor to actually process- like we did)
Once puréed, return to the saucepan with 3/4 cup sugar, 1/2 cup rum (or prune juice). Cook until thick (you are making a prune jam/butter deal here... kind of like making Apple Butter). Add spices to taste... One recipe called for 2 tsp. of Cinnamon, another for cloves, and yet another for cardamom. We used all 3, until it tasted perfect for us. Just keep tasting until you like what you have. Cool Completely.

To Assemble:
Pick out your ugliest cake layer and put it on the bottom. Spread an even layer of filling over top (using enough to all your layers are even). Put another cake on top, and spread with filling again. Save the best cake layer for the top
Once all assembled, Cover well with plastic wrap and let sit for AT LEAST 24 hours. Older recipes say 2 weeks. Vinatarta freezes well also.

You can cut slabs of cake if you choose, or cut into nice little rectangles instead. Another option is to frost the top with Almond butter cream, but my mom didn't want anything to do with that. And I don't think it needs it.

Have a Very Merry Holiday Season, and I hope you try this wonderful Christmas cake. Unless you are a kid, then you might not like it... I sure didn't... But I do now, and that is what I was trying to say... very ineloquently.

Saturday, December 8, 2012
17 Days until Christmas... Spicy Gingersnaps!

I don't remember exactly where I found this recipe, So I have no source, but I have made it so many times, that It is almost engrained into my brain permanently....

2 Cups All Purpose Flour
1 TBSP ground ginger
1 tsp. ground cloves
1 tsp. ground Cinnamon
2 tsp. Baking soda
1/4 tsp. Salt
1/2 cup Butter (softened)
1/2 cup Granulated Sugar
1/2 cup Molasses
1 large Egg
Turbinado Sugar (you can use regular granulated if you prefer)

Cream Butter and Sguar together.
Add molasses and egg - mixing well between each addition.
Mix until well combined.
Slowly (and in batches) add the flour mixture and beat until completely blended.
Cover and Chill for about an hour in the the Fridge (until firm)
Preheat oven to 350 F.
Pour the Turbinado Sugar into a bowl
Roll the chilled dough into balls about 1" in diameter.
Roll the balls into the sugar until evenly covered, then place on a parchment paper lined baking sheet.
Bake for about 12 minutes or until lightly browned and puffed.

ENJOY! I love these cookies and I'm sure you will too!

Friday, December 7, 2012
18 Days Until Christmas... Opps I did it again

Just a heads up... These sock snowmen are a little bit addicting... Kind of like Tattoos. I've decided to make some as gifts for two reasons: a) they are too adorable... who wouldn't want one?, and b) then I can keep making them without ending up with a sock snowman army.

Thursday, December 6, 2012
19 Days until Christmas... Sock Snowman again
I made another sock snowman... (See Yesterday's post)

Aren't They adorable? I think they need names...
Any suggestions?


Aren't They adorable? I think they need names...
Any suggestions?

Wednesday, December 5, 2012
20 Days until Christmas...Sock Snowman
I came across a Tutorial on Pinterest for some Sock Snowmen, and I instantly knew that it was fate... I have this habit of going through socks like Crazy... but then I never throw them out. Also, our dogs like to steal socks and then play tug of war with them... So I have alot of socks that either need to be used for something, or thrown out... Enter Sock snowmen!

I am not going to give you a Tutorial... But if you have some socks, some rice and a glue gun, then you can totally make one of these... SO cute! I love them!

Before I forget... HERE is the link to the best sock snowman tutorial that I have seen. It is from "Then She made..." (love that name!)


I am not going to give you a Tutorial... But if you have some socks, some rice and a glue gun, then you can totally make one of these... SO cute! I love them!

Before I forget... HERE is the link to the best sock snowman tutorial that I have seen. It is from "Then She made..." (love that name!)

Tuesday, December 4, 2012
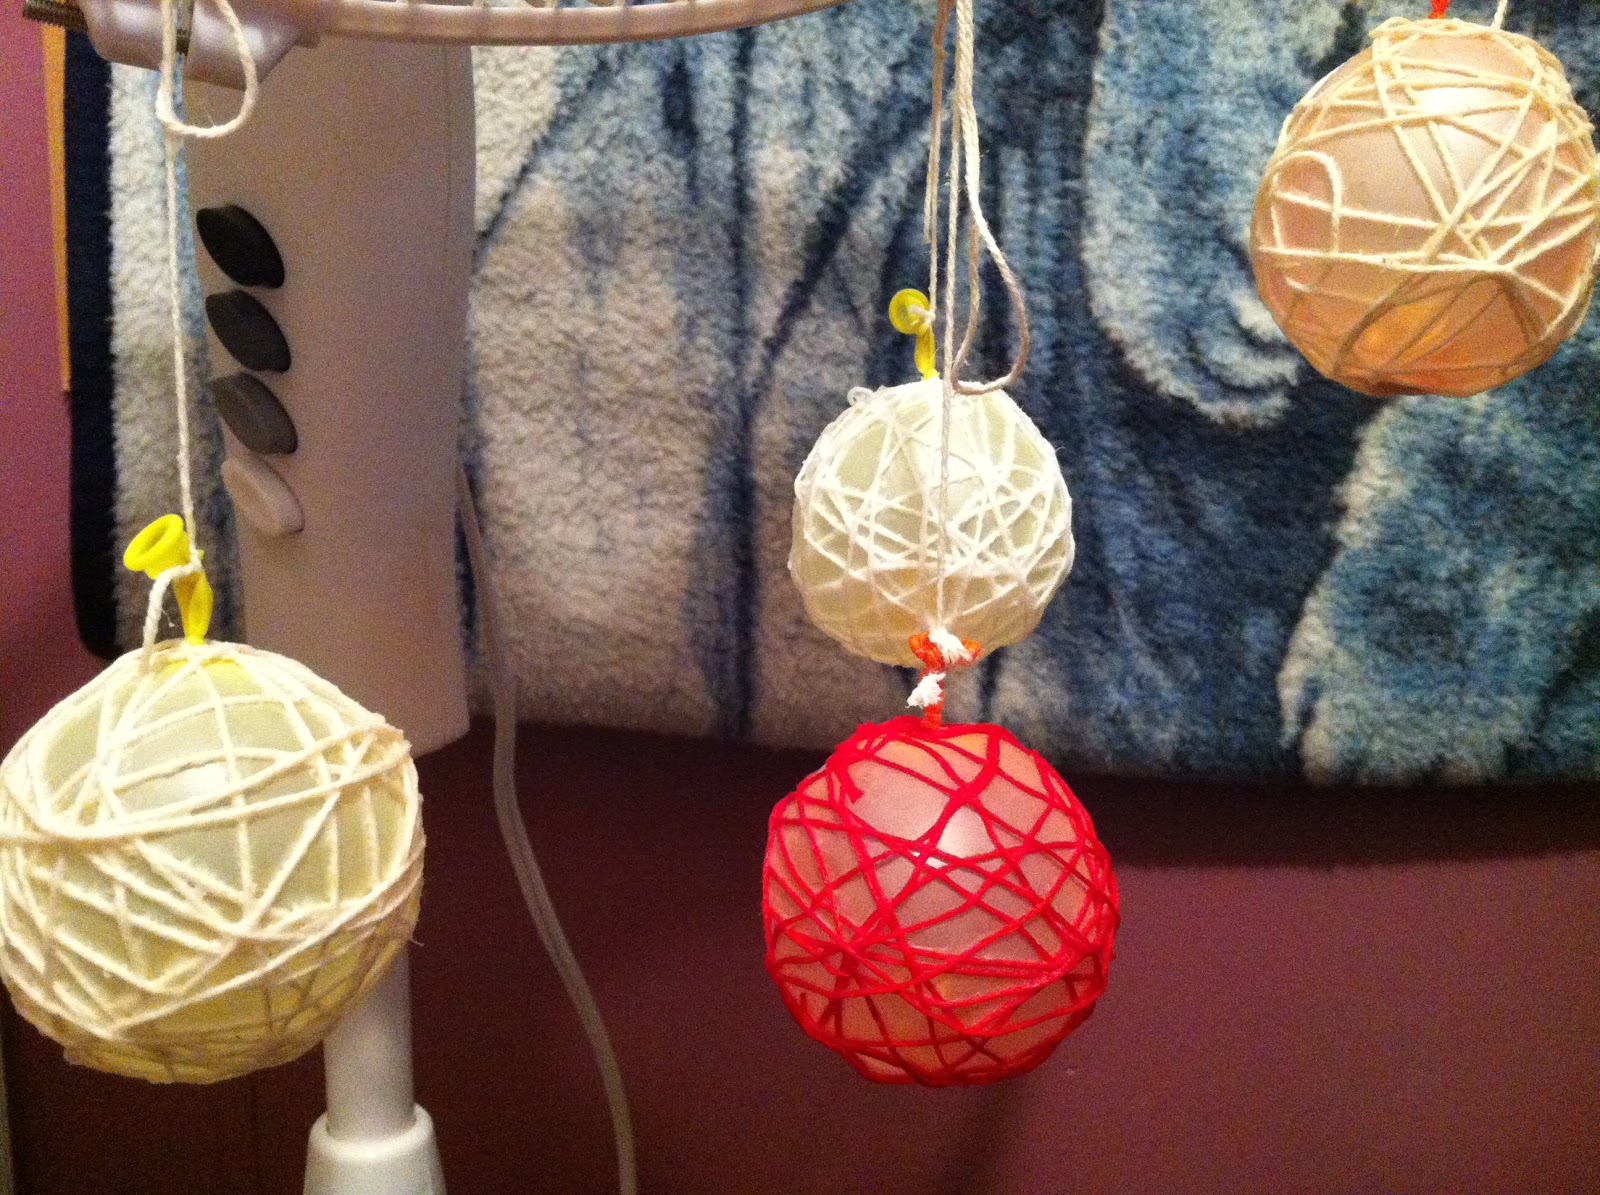
21 Days Until Christmas... Jingle Balls

I called these Jingle Balls, a) because they are ball shaped and have Jingle bells in them, and b) because it is funny... Like ordering Chicken Balls for Chinese food - makes me crack up every time.
I have yet to get any good pictures of them - Maybe once we have the tree up and decorated... But the idea is basic and simple, and easily executed. You just need some white-glue-drying-time patience (and a place where your dogs wont try to play with them...)
I just realized I don't have any pictures of them finished... so these will have to do for now, I will definitely get some finished and on the tree pictures up as soon as I can.
You will need:
-water balloons -or regular size balloons if you want to make big balls (hehehe)
-Jingle Bells - to put inside the water balloon, so it ends up in the string ball
-string
-white glue (you could use fabric stiffener too... I like white glue because it is cheap, i already have it, and I don't need to go searching for an expensive addition to my crafting supplies that we are already drowning in.)
-somewhere to tie these up so they can dry until hard, without being disturbed. (I left mine for a few days, just for good measure, and not at all because I had forgot about them)
Step 1- get the jingle ball into the water balloon. This is probably the most difficult part. I should also note that you should probably pick some jingle bells that are not tiny. When you are wrapping your string around, you will need to make sure that every hole is small enough to keep the jingle bells inside the string ball.
Step 2- blow up jingly water balloon until is is rounded. You can always let air out of the balloon, but it becomes a pain to have to blow it up more. (don't forget to tie it. - I wasn't going to add that in, but just in case)
Step 3. tie a separate string onto the tied end of the balloon, so you can hang this sucker up to dry.
Step 4 - Glue goes into a bowl... and Step 4a - unravel some string now so you dont have to deal with tangled string while your fingers are covered in glue (Yep, it is going to get messy)
Step 5- String goes into glue... and then you start wrapping around the balloon. You are going to want to remove some of the excess glue from the string, but not too much... you want it there to add the strength.
Step 6- wrap the string around and around and around in random directions until you have it the way you want it. - Making sure that all the spaced between the strings will be small enough to keep the Jingle Bell in there.
Step 7 - Let dry VERY well
Step 8 - Pop your balloon
Step 9- You will probably need to use a small knife to cut out some of the dried glue from the spaces. And to fully remove the balloon.
Step 10- Tie a string around it so you will have something to hang it up with (if you want your Jingle Bells to hang)

Monday, December 3, 2012
22 Days til Christmas... Oh-no-Gingerbread Man Ornament
Like the snowman tags and the pretty flowery-star thing from the last two days?
Today, I'm going to share a tutorial with you... NOT me giving you a tutorial on how to do
something, but I'll send you the link to it. Because it is easy to follow, and pretty thorough, and the results are amazing. I fell in love with this one as soon as I saw it on Pinterest, but now that he is hanging in front of my face (until we get our tree up), I am even more in love.
The Tutorial and awesome idea come from Elsie Marley. Here is a picture of her beautiful Gingerbread Man. (and totally go and make one for yourself).
I was out of ink in my printer, and out of paper also. (REALLY need to go shopping for supplies soon) So I just drew the basic gingerbread man shape onto some scrap paper, and cut that out as a template... Then I made the basic plan for where the bites into his head and leg would be. I used Seed beads (that I thought were black, but they turned out to be navy blue) for his eyes, and since I don't have any button stash or rick rack ribbon, I just used some felt

Then I blanket stitched him up, and put a little fiberfil in him, trimmed off any excess felt from his fancy felt wrist cuffs...

And Ta-Da... ready to hang on the tree... Now we just need to figure out a name for him...

Today, I'm going to share a tutorial with you... NOT me giving you a tutorial on how to do
something, but I'll send you the link to it. Because it is easy to follow, and pretty thorough, and the results are amazing. I fell in love with this one as soon as I saw it on Pinterest, but now that he is hanging in front of my face (until we get our tree up), I am even more in love.
The Tutorial and awesome idea come from Elsie Marley. Here is a picture of her beautiful Gingerbread Man. (and totally go and make one for yourself).
 |
| Elsie Marley's awesome Gingerbread Man |

Then I blanket stitched him up, and put a little fiberfil in him, trimmed off any excess felt from his fancy felt wrist cuffs...

And Ta-Da... ready to hang on the tree... Now we just need to figure out a name for him...

Sunday, December 2, 2012
23 Days til Christmas...Pretty Christmas Tree ornament
Did you like the snowman tags from yesterday? Super cute right?
Today, is a little different. It's a felt ornament.
I saw this photo on Pinterest (and obviously pinned it, and obviously went to the corresponding link) GORGEOUS isn't it? It is by Wandering Lydia. Here is a link to her beautiful Etsy Store too.
ABOVE = Wandering Lydia's (my inspiration)
BELOW = mine... Pretty, jingle-bell-y tree ornament (Can't wait to hang it up)

Today isn't a tutorial. More of a few photos to help inspire somebody else to make something as pretty just for themselves too.
 I made mine to be a pretty handmade ornament, and used a brass Jingle bell in the centre to cover up where the individual petals join each other.

Today, is a little different. It's a felt ornament.
I saw this photo on Pinterest (and obviously pinned it, and obviously went to the corresponding link) GORGEOUS isn't it? It is by Wandering Lydia. Here is a link to her beautiful Etsy Store too.
 |
| I obviously don't own this photo, or take credit for any of this beautiful work. I wanted to share my inspiration, and help pay the inspiration forward. |
ABOVE = Wandering Lydia's (my inspiration)
BELOW = mine... Pretty, jingle-bell-y tree ornament (Can't wait to hang it up)

Today isn't a tutorial. More of a few photos to help inspire somebody else to make something as pretty just for themselves too.


Saturday, December 1, 2012
24 days until Christmas... Snowman Bag-Tags
I'm starting out with something SUPER easy.
Like you can knock a ton of these out in just a few minutes if you really wanted to.
I saw them on pinterest way back in the summer i think, and I knew I had to make them this year. They are too cute (and too easy) not to!

The original Tutorial is here. It's from Crafts by Amanda... And it is a genius-ly simple idea to really dress up a bag of Christmas cookies
Like the ones I am planning to make for our neighbor/landlord.
I did make mine a teeny tiny bit different than Amanda did. For one, I had plain white bread tags that I got from the bakery I work at. So I didn't need to paint them all white before I started. And secondly, for the pink cheeks:

I just used a red pen (a uniball liquid micro tip pen). I put a little dot of ink with the pen, and then I just rubbed it around with my finger, until they looked like nice pink-rosey cheeks.
 | ||||||
| They look more like blushing ghosts without their carrot noses don't they? |

I'll try and get some pictures later on in this series of my cute little snowmen actually holding bags of cookies shut... I just need to bake the cookies first.

Merry Christmas!!.. Only 24 more days!
Subscribe to:
Posts (Atom)