Showing posts with label yummy. Show all posts

Tuesday, September 27, 2011

September 2011 Daring Baker Challenge = FRESH, FLUFFY, FRENCH


I was so thrilled when the challenge this month was Croissants, As they are on my baking bucket list (see for yourself). So I finally had an excuse to make them. Although, it would've been easier in a cold-weather spell.... Can't wait to try this again in the winter, now that I have done it once, I can learn from my mistakes. Not that there were many mistakes, They tasted AMAZING.

Thanks for the great Challenge Sarah!

Blog-checking lines: The Daring Bakers go retro this month! Thanks to one of our very talented non-blogging members, Sarah, the Daring Bakers were challenged to make Croissants using a recipe from the Queen of French Cooking, none other than Julia Child!


In the recipe notes, Sarah included a link to a Julia Child video on YouTube, which was VERY helpful, and pretty entertaining. I had just watched Julie and Julia a few days before I got this challenge also! Great Timing.


As Usual, I'm going to send you to the Daring Kitchen website to find the pdf file of this months challenge. Sarah included a ton of step by step photo's that were very helpful.


My Croissants didn't last long at all. We ended up eating half of them right after they were done baking, and then the rest for breakfast the next morning. I can't wait to make these again! Again, Thanks Sarah for giving me a reason to finally make Croissants!

Kitchen Heroes

Thursday, September 15, 2011

Pumpkin Pie


September 1st, we had a party at work. It was my friend's last day, and so we all pitched in to make something for him. I was in charge of dessert. And I asked him what he wanted... Pumpkin Pie.

I said a little secret "YES!" to myself, because homemade pumpkin pie is on my cooking/baking bucket list, and I finally had an excuse to actually make it.  I have honestly never had a homemade pumpkin pie. Always store bought. I would like to actually make my own pumpkin puree at some point too, but the middle of summer isn't really pumpkin season, so that will have to wait for another time.

I made Vodka pie crust, The Cooks Illustrated recipe, that Smitten Kitchen posted.  It was awesome. I will definitely make it again (hopefully for apple pie if I can go rob my grandma's apple tree!). Although, i might just use all butter instead of mixing in some shortening with it. Butter is better!


I followed the pumpkin pie recipe that came with the can of pumpkin puree, But for my second pie (because it makes 2), I used Maple Syrup and brown sugar to taste instead of just brown sugar. The Maple Syrup pie was AMAZING!!! I am the official thanksgiving and Christmas pumpkin pie baker now... no more store bought!

My photos will show the process a little better than I can explain them, and for the pie crust, head over to the Smitten Kitchen, because she has step by step instructional photo post, and It is very helpful!

It was super late when I finally finished making this pie, And I totally spaced and forgot to take a picture of the pie when It was all done baking... oopsie.


My pie crust!

Pumpkin cutter crust embellishments ;)

Pies baking in the oven.... which I really need to clean... :(


 Pumpkin Pie, Like the Sourdough bread... MUCH easier than I expected.

Wednesday, July 27, 2011

July 2011 Daring Baker Challenge: Fresh Fraisiers


Blog-checking lines: Jana of Cherry Tea Cakes was our July Daring Bakers’ host and she challenged us to make Fresh Fraisiers inspired by recipes written by Elisabeth M. Prueitt and Chad Robertson in the beautiful cookbook Tartine.

SIDE NOTE: I am trying to be more thoughtful (I don't know if that is really the word I'm going for, but it is the only one that comes to mind right now) about my pictures. Instead of posting them straight off the memory card, I am going to try and edit them a little before I post them... Hopefully this will make a difference and challenge me a little more.


Whew, this was a fun challenge. With delicious results. Since it was the boyfriend's birthday on the 15th, I made this as his birthday cake. Killed 2 birds with one stone, so to speak. I made this on the Saturday (the 16th). I got to sleep in until 8, then started whipping up the Pastry cream, followed shortly by the Chiffon cake (which I love, and will for sure be making again). I followed all the directions closely with the Chiffon cake and didn't change a thing.


With the pastry cream though, I used the recipe over at The Joy of Baking. I didn't really like the idea of the gelatin recipe that came with the challenge, so I wanted something that wouldn't make me cringe with the thought of where gelatin comes from.


Inside, I used strawberries and blueberries... and on the very inside, I just used cut up strawberries and a handful of blueberries. I topped the cake with whipped cream and more strawberries and blueberries, and a few cherries.


I will be making this cake again, although I will probably make it smaller, and use whipped cream in the middle instead of pastry cream. I think the lightness of the whipped cream would suit my taste buds better.


I am really proud of my challenge this month, and can't wait for this post to be posted. Also, make sure you go over to the Daring Kitchen website and check out the other Daring Baker's Creations.

(OH, also, I don't really like Marzipan, so no Almond Paste top for this girl, although the pretty pink top would've been nice)


I would have loved to have used my own strawberries in the cake, But they aren't quite ripe... we do get one or two every few days though, but not enough of a crop at one time for this whole cake.

Tuesday, July 5, 2011

Crab and Artichoke Dip


WAY back in February, My friend Erin posted a recipe for Hot Crab and Artichoke Dip, and I have had it bookmarked since. Well, I have FINALLY bought all the ingredients for it today, after drooling over this recipe for the last (nearly) 6 months. But it got me thinking of another Dip I want to make too.
My friend Sophie makes an amazing Spinach Dip, and I have never been able to recreate it, and She will not share her recipe... It is kind of her trademark dish, So I don't really blame her. I guess I will just have to come up with my own Spinach Dip instead of trying to copy hers... Any Spinach Dip tips?

Anyway, lets get to it... I definitely recommend going over to Erin's blog, because she posts some amazing stuff...


Crab and Artichoke Dip
Adapted from: A Tale of One Foodies Culinary Adventures

4oz Cream Cheese
2 TBSP Chili Sauce (I used the Rooster Sauce)
1 TBSP Horseradish (prepared)
1/2 cup Plain Greek Yogurt
1/4 cup sour cream
1 Can of Artichoke hearts... drained and chopped
1 1/4 cup Crab meat (fresh or frozen)... (I ended up having to use Canned... Not being near the ocean means not a great supply of affordable fresh seafood... AND the frozen stuff was all still in legs, and I wouldn't bother shelling it just to put it into Dip)
1 Cup finely grated Parmesan or Romano cheese


Use a hand mixer to cream together the first 5 ingredients (add spices to your taste too... fresh garlic would be a good one... I forgot to buy some at the store though, and it tastes just fine without the garlic)

Once everything is smooth and well mixed (make sure you use a rubber spatula to pull down the sides, so everything gets mixed in), stir in the crab, and artichoke hearts.

Place the dip into a small baking dish (I used an 8" round casserole dish for this) that has been greased.


Cover the top with the grated cheese, and bake in the oven at 350 F for about half an hour. You want the cheese to start to brown a little, and everything to be a little bubbly.

Serve with Pita chips, Crackers, or Tortilla chips, and Enjoy!


Sorry the pictures are crappy (again)

Saturday, June 18, 2011

Chicken Souvlaki


Its Greek night in my house apparently. I was feeling very inspired, and make Chicken Souvlaki and Spanikopita, and sautéed Zucchini...

I'll share the Spanikopita recipe another time, but here is a picture of it fresh from the Oven:


For the Chicken Souvlaki:

1/4 cup Fresh Squeezed Lemon Juice
Zest of 1 Lemon
1/4 cup EVOO (extra Virgin Olive Oil)
5 gloves of Garlic -minced
Dill and Oregano (I apparently ran out of Oregano, so I just used the Dill)
4-6 Chicken Breasts, Cubed
wooden skewers (soak them for a few hours before you plan on cooking with them, otherwise they can scorch in your oven)

Combine all the Ingredients above in a Ziploc bag and let marinate for at least an hour. Turning as often as you like... but at least once so everything gets as evenly coated as possible.
When done marinating, lace the chicken onto the skewers


Put on a baking dish and bake in a 375F oven for about half an hour (until the chicken is cooked)


Then transfer to a frying pan, on high heat, to help brown and crisp up the outside.


Serve with Tzatziki sauce and whatever else you chose. (Like Zucchini and Spanikopita)


Sunday, June 5, 2011

Oreo Cupcakes


I have had cupcakes on the mind a lot lately. A new girl we have at work introduced me to Cupcake Wars. I'm kind of addicted now. You should watch it... It is incredible what they create in such a short amount of time. And with such weird ingredients. Watch the Sea World episode and you will know what I'm talking about.

This cupcake, I just HAD to try. I saw the recipe and I went and bought Oreos JUST to make these cupcakes. And OMG they are amazing. The recipe makes 24, But I scaled it back to 12. I also changed the frosting, from the original. I'm going to give you the ingredients for 24 cupcakes, since my conversion skills suck, But I did learn something new while Converting-something I should have probably known before. 1/8 cup = 2 TBSP, 1/4 cup = 4 TBSP
And one little bit of advice: Don't use the giant-sized muffin liners like I did.


Oreo Cupcakes
yield: 24, Original recipe: Annie's Eats

24 Oreo Halves, with cream filling attached.
2 1/4 cups All Purpose Flour
1 tsp baking powder
1/2 tsp Salt
1/2 cup Butter
1 2/3 cup Sugar
3 large egg whites
2 tsp Vanilla Extract
1 cup milk
20 Oreo cookies, coarsely chopped (quarter them)


Preheat oven to 350 F; Line cupcake pan with paper liners. Place the Oreo halves in the bottom of each liner, Cream side up.

Whisk together flour, baking powder and salt, set aside.

In the bowl of an electric mixer, combine butter and sugar and beat until light and fluffy at medium high speed. Blend in the egg whites, one at a time, beating well after each addition. Blend in the Vanilla. Turn the speed down to low, and beat in half the dry ingredients just until incorporated. Add the milk and beat just until combined, Then mix in the remaining dry ingredients (i did that last part by hand). Gently fold in the chopped Oreos until evenly incorporated, being careful not to over-mix.

Divide evenly between your prepared liners, Bake 18-22 minutes, rotating pans halfway through baking, until a toothpick inserted comes out clean. Allow to cool in the pans for about 10 minutes, then transfer to a wire rack to cool completely.

Whipped Cream Butter cream Icing
1/2 cup softened Butter
3 cups Icing sugar
1/4 cup whipping cream
2 tsp Vanilla

Cream butter until REALLY light and fluffy
Slowly add Icing Sugar Vanilla and whipping cream until It is the right consistency for your taste. You want it Thick and Fluffy.

Put into a piping bag and pipe onto the cupcakes, And then top them with the other Oreo halves without the cream attached.

Sunday, May 29, 2011

Adventures in Canning - STRAWBERRY JAM - (first and second attempts)


My Actual First Attempt at Canning, resulted in Strawberry sauce rather than jam. It was delicious, but I had a few issues with it:
  1. More Sugar than fruit. I know the pectin needs the sugar to set up, but REALLY... The recipe called for 2 1/2 cups of crushed strawberries, and 3 1/2 cups of Sugar. All you could taste was strawberry flavoured sugar.
  2. That was really my only problem with it. I should have bought more jars than the 4 that came with the caning kit, but that is totally my mistake.
So from my first attempt, I learned a lot, and got a pretty yummy strawberry sauce (that was incredible on ice cream)


While I was home, my mom and I attempted making Strawberry Jam for a 2nd time:


The 2nd Attempt was sooooo much better. We used the no sugar needed Pectin, Which calls for 1 cup of unsweetened Apple Juice. To keep on the home-made theme, We pulled out my mom's pain-in-the-ass-to-clean Juicer and used Fresh Apple juice straight from the source in our jam, as well as one grated apple to up the pectin content in the jam.

This time, it was actually jam!!!! and omg it is delicious. I don't know if I will buy jam at a store ever again.

The Farmers market is about to start up here again, There is finally no snow (although it has rained for a week straight), and the grass seemed to turn green over night, the trees have leaves and I can finally put my tomato plants outside. I planted Zucchini in the ground, and My Rhubarb plant has already taken over the flower bed. The break from Winter is finally here!!!
And the Miracle of No Snow on May Long weekend happened... I can't really remember a May Long where it didn't snow, so it really is a miracle...

Also, I found some Raw cashews, so in the next few days, I'm going to try this recipe from Joy the Baker

Enjoy the sunshine/break in the rain if you can, before we know it, it will be winter again. Soak it up while its here

Wednesday, May 4, 2011

Cornish Pasties

In 2007, I went a little crazy, and made a decision to find a job in England and go see a different part of the world before I had a real life and people to try and make me stay.
So In 2008, I was in England. More specifically, In Cornwall... Which is very beautiful and I definitely recommend going and checking it out if you ever get a chance.

I lived in the little village of Lerryn... actually outside of it, and I worked part time at the village pub where I met some AMAZING people, and truly witnessed the kindness of strangers... And drank a lot of Rattler (and you should to if you go there... just avoid unstable picnic tables after a few pints)

This is the part where I show you a bunch of beautiful pictures from my trip and tell you about the seagull that harassed me for my fish and chips in Looe, or the most amazing Cornish Pasty I had in Fowey (go there too! Very cool village)... But I updated my computer, and I still haven't put my pictures back on it, so they are on my external hard drive, which I forgot at my parents house last time I was there... So you'll have to google these places, or just harass me enough to put pictures up here.


Anyway... I've been a little nostalgic about England lately... My cousin is on a trip to Ireland, and a few days in London as well), and I am just a teeny bit jealous (however, she is a photographer, so you can check out her blog, She's put up some images already, and I'm sure there will be a ton more once she gets back)...
Where was I going with this???
hmmm
whatever... CORNISH PASTIES!!!

I made them
They are delicious
They are as close as I have tasted to the best one ever that I had in Fowey
So I'm pretty proud

REALLY proud actually
Not enough to work on my Cornish (pirate) accent... But pretty damn proud
So you should make them too
No idea what a Cornish Pasty is? Watch this video on Youtube

(I don't want the Cornish Pasty society to get mad at me, so I guess these are Alberta Pasties)


Ingredients you will need:
Flour
Butter
Water
Steak meat, cut into small cubes (whatever cut you want, just make your pieces kind of small)
Potato
Turnip
Onion
Egg (lightly beaten)
Salt and Pepper (to season)

Make a shortcrust pastry... There is a video of Gordon Ramsey showing you how on youtube too... Here
I used the recipe Here on my first attempt, and then Ramsey's recipe in the video on my 2nd attempt
Note: I think my pastry could use a little work to get closer to the real thing. Will need to play with it a little more

So if you follow the directions in the video(s), while your pastry dough is in the Fridge resting, use that time to cut up all your meat and vegetables and get ready to roll out the dough

Roll out to about a 6-8" circle

load the meat and veggies in the middle, season with salt and pepper ( you can mix all the veg and meat together and season in a bowl if you want, but I think its easier and makes less dishes if you just load and season on the pastry circle)

add a small slice of butter on top

brush egg wash all around the outside of the circle


fold the edges together to make a semi circle (watch some videos on youtube for technique)

Make sure they are sealed and then crimp the edge

Put your pasties on a parchment lined baking sheet


brush with the egg wash

Put in a 400F oven for about 45 minutes... cut into one to make sure your meat is all cooked.

Let them cool for 10-15 minutes and then enjoy every delicious bite!

Thursday, April 21, 2011

Black Forest Cake!


I have been meaning to tell you about my Black Forest Cake for nearly 2 weeks, but Life keeps getting in the way...


...and I keep telling it to go away and come back when I'm ready to deal with it

But it totally doesn't listen to me

I finally went and got my License renewed today... The last day I could before It expires

And then didn't have enough money in my bank account to pay for it

Luckily I had some birthday cash hanging out in my Wallet (thanks Grandma! I can still drive a car thanks to you!)

Then I figured I needed to go and do something to make me feel better and less like a failure at life, so I finally stopped at the vet clinic by our house and made an appointment for Ava's shots... and got an estimate on Wilson's neuter if i can ever convince the boyfriend to not feel bad about chopping his Balls off.

But you don't want to hear about any of this...


so Let me show you the Black Forest Cake that I finally checked off the bucket list...

...which was delicious, and even better than I imagined.
Although, we used a Chocolate cake recipe, that I don't really like, so next time I'll try some kind of Chocolate Sponge Cake, I think that would be much nicer (I wrote the chocolate cake recipe down, but I have lost the piece of paper somewhere between my parents house and my house, so if I do ever find it, I will post the recipe here, until then, I guess I just have pictures for you)

Honestly, I don't know why it took us this long to make this cake. It was pretty easy! (and amazing). We thought we put a lot of the Cherry Kirsch on too, but It wasn't very boozy... I think next time I'll add more than I think is enough, and We'll be in business!


The night before we made the cake, I shaved a bunch of chocolate squares into Chocolate shavings. I tried to take a picture, but it was late, so not light, and honestly, a bowl full of chocolate shavings isn't that pretty... but tastes so much better than store-bought chocolate sprinkles.

Then bright and early in the morning (while I worked on my Daring Baker challenge for the month... will post on April 27... but don't hold your breath, I wasn't very inspired) I made the cakes
They rose really high in the middle, so we had funny looking layers, But really easy to cover up. My mom knows a lot of tricks, after years and years of cake decorating so I try and force them out of her, so I can learn them too.

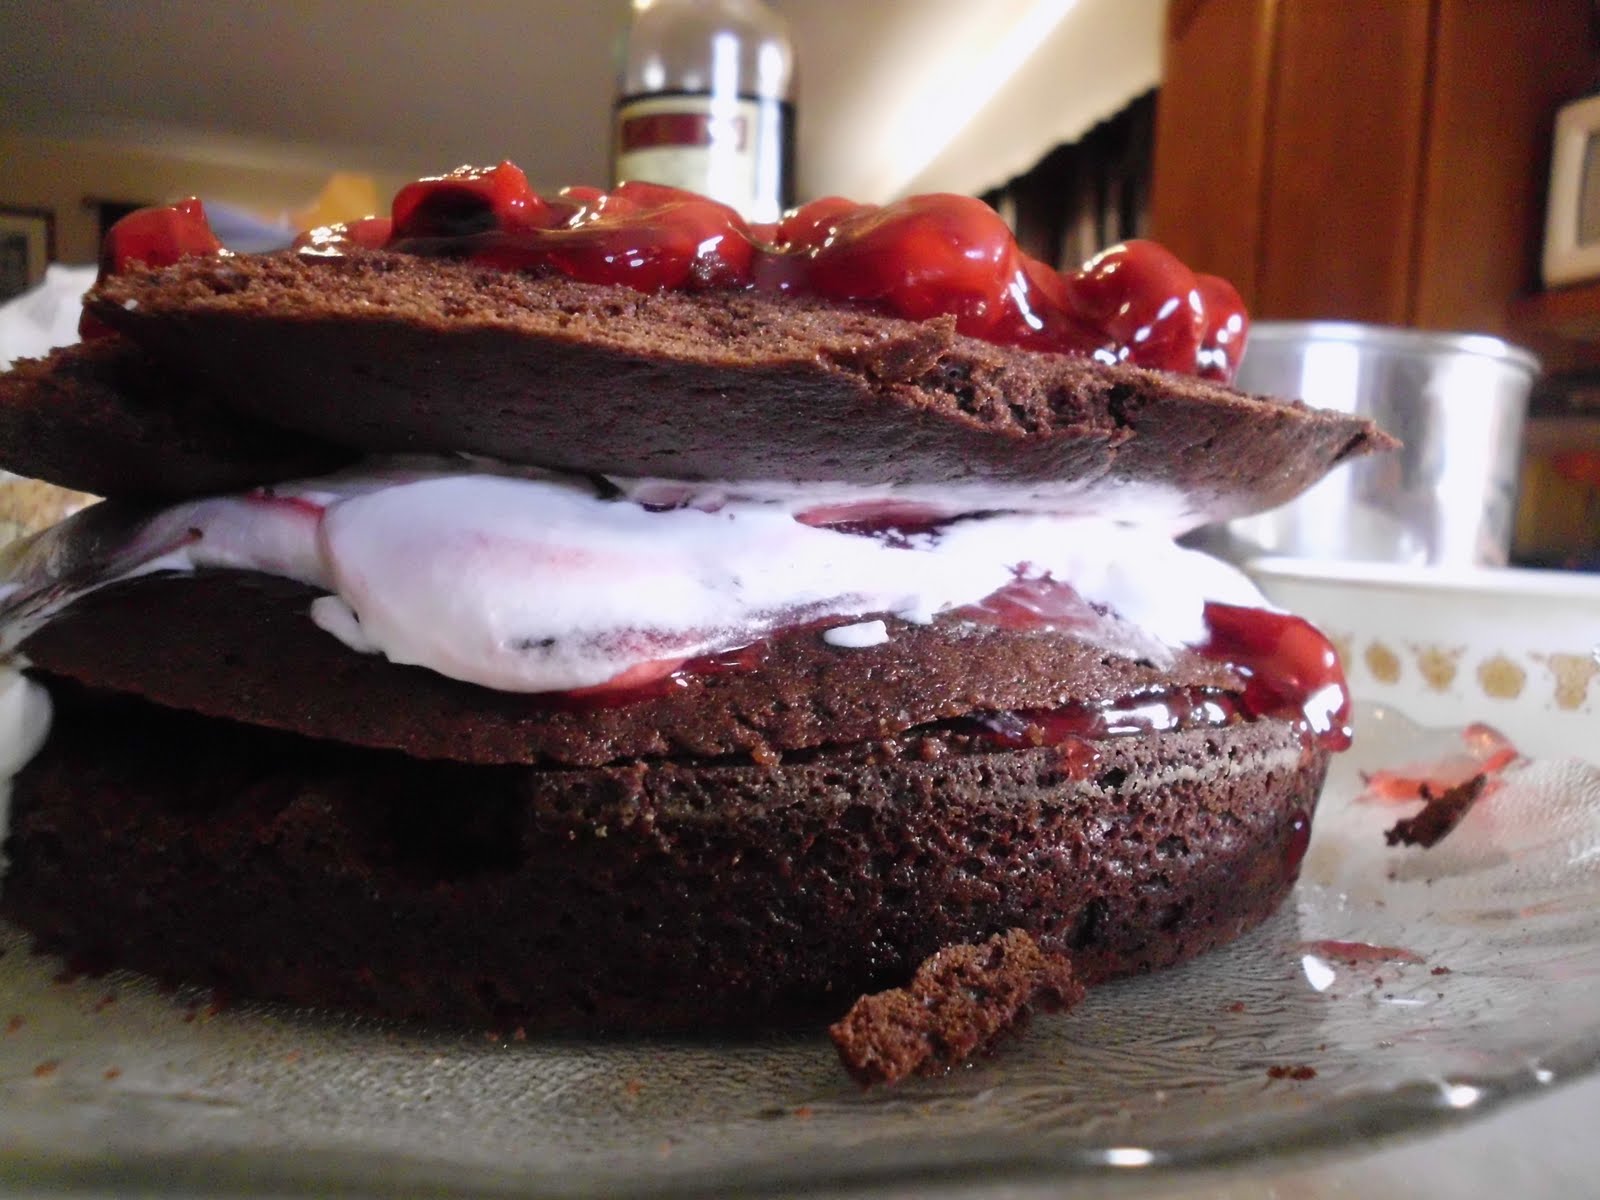
Then we layered the cakes (Two 9" chocolate cakes, sliced in half) with Canned Cherry Pie filling and a little whipped cream in between each layer.
OH, and Cherry Kirsch brushed onto the cakes... Probably the most important part

See... funny layers... but definitely yummy!


Then you just coat the thing in Whipped Cream, push some Chocolate sprinkles onto the sides, and then pipe some Whip Cream puffs (stars, whatever you want to call them) onto the top
Then add some maraschino cherries to each puff
and TA DA!!!!

Black Forest Cake
(Finally checked off the Bucket List!)