Monday, March 28, 2011

Cream of Broccoli Soup

If you ever go to Subway and get soup with your sandwich... and they have the Cream of Broccoli and cheese.... Get it. It is one of the best things ever... OR make your own... because that is even better!


Wash, and cut up the Broccoli... make sure to reserve about 2 handfuls that are cut into really small florets ... Also, you can use the stem, just make sure to peel the outside layer off.


With some Olive oil over High heat, saute garlic and onions until fragrant... Add in broccoli and keep stirring.. .about 2 minutes. Lower heat, add in some soup stock (Homemade is better, but use the other stuff if you want). Cover and let everything cook together. (Also, you can add in a little potato before the broccoli, it adds some thickness and another layer of flavour, but it isn't necessary).

Once everything is nice and soft, blend everything in a blender... I use my Magic Bullet, working in small batches. Make sure to add more soup stock, to help everything blend together well.

Pour the Puree into a large pot. Add some Heavy Cream, and more soup stock if you need/want to.

Add in the reserved Broccoli florets, and about a handful of fine-grated cheese. Stir , and Heat over very low heat. Make sure you stir the soup often, so nothing is sticking to the bottom... Don't add too much cheese at this point, because it gets greasy and kind of takes away from the soup... I like to add it to the top of my soup instead.

Ta-Da.... Cream of Broccoli and cheese soup

Sunday, March 27, 2011

Homemade Country Chicken Soup AND Country White Bread


NOTE: Wrote this March 6th, But just getting around to posting it now... ooops


What the hell is up with Winter this year??? Like Seriously! Somebody should tell him that its March already, so we don't need -30 temperatures with Wind Chill warnings past the -40 mark... That is for Actual winter... not the long tail end of Canadian winter...
Today, the warmest it was outside (according to Environment Canada whenever i checked... I didn't actually go outside) was -17! Currently the Windchill is -30

Days (and by that, i mean Weeks... or Months), like this definitely call for Soup. And since I made a crap-load of Homemade Soup Stock (inspired by A Tale of One Foodies Culinary Adventures), and found super cheap Chickens (and then roasted them)... I made Soup today... And Bread... YUMMY

I have a confession to make... I am horrible at doing the dishes. I have a bunch of the ziploc containers so I can take my Lunch to work with me... Which is all well and good...
But then...
I have to remember to bring it back to my car to take home at the end of the day
I have to remember to bring it from my car to the house
I have to remember to rinse it out and stick it in the dishwasher
I have to remember to turn the dishwasher on

Because this seems to be difficult for me to do... I have a pretty good collection (err... almost all of the containers i own) stashed in my car.
This is why i won't be having soup for lunch at work tomorrow :(

Onto the Recipe, because that is much more inspiring that my horrible dish-keeping/cleaning confessions. (However, i would like to note, that I am much better about this in the summer than the winter.. In the winter, its too damn cold and nothing in there is going to rot, its just going to freeze.)

I FORGOT to take pictures of the soup.... But here is the chicken that made it into the soup... (and made the soup stock with)


Country Chicken Soup

Ok, yet again, I don't have exact measurements for you. Soup is kinda like that though.
Chicken meat (left over, or whatever works for you... as much or as little as you want/your soup pot will allow)
Carrots - sliced
Celery - sliced (larger than the carrot pieces)
Onion - chopped (whatever size you want)
Garlic - minced, or at least finely chopped
Olive oil
Chicken Soup Stock (make your own, its sooooo yummy!)
Water
Corn (I used a can of corn)
Spinach
Fresh Parsley
salt/pepper/seasoning

In your soup pot, heat up some Olive Oil. Once warm, add in the garlic, cook til fragrant, then add in the onion - stirring constantly. Add some soup stock (i used about 4-5 cups), Add carrots, and let come to a boil. (this gives the carrots a little head start in softening)
Fill pot with more Soup stock, water and celery
Let simmer for about 10 minutes. Taste then season a little... Simmer 10 minutes, taste and season.
Add in the corn, Chopped Spinach and fresh parsley, put lid on, and Simmer
Check your soup at least every hour... half hour is better
Taste and season as needed
The longer (and at a low temp) you cook it, the yummier it seems to be. My soup was on the stove at about 10am, and we ate at 6pm
Its not an exact science at all. The basic idea is to put a bunch of stuff you like in a pot with water and seasoning... Taste as you go is the trick. Its a good idea to put less salt than you might want in there, and let each person salt their own soup. This keeps sodium levels down. (My mom consistently adds a ton of salt to soup, and I'm trying to get her to cut it out)


Country White Bread
(www.cookingbread.com)

OH NO! I forgot to take pictures of it too! :( FAIL... But the Bread was Delicious.... Go make yourself a loaf of it (recipe makes 2 loafs, might be a good idea to half it, unless you eat a lot of bread, But we don't

So, Since I forgot to take pictures of the Soup AND the bread... here are some photos of my soup stock that I made after reading The post at A Tale of One Foodies Culinary Adventures...
Above = Before cooking
Below = a few hours in.... at that stage, my house smelled soooooooooooooooooooooooooo yummy!!!

March 2011, Daring Baker Challenge - Yeasted Coffee Cake with Meringe

Out of the 3 challenges I have done, this one has been the hardest... I don't know if I would make this again, But I'm glad I tried it. Although, after seeing what fillings the other bakers had tried, I might attempt again.
I also thought that a savory version would probably have worked better, But it has been a crazy month, so I never got to try and make the savory one I wanted to attempt. But onto the challenge:

Blog-checking lines: The March 2011 Daring Baker’s Challenge was hosted by Ria of Ria’s Collection and Jamie of Life’s a Feast. Ria and Jamie challenged The Daring Bakers to bake a yeasted Meringue Coffee Cake.

First of all... Here is the link to the Daring Kitchen, You should be able to find the Recipe there...

Second, I'm going to show you my photos with a little commentary. I think I would've liked this bread a lot more if this month hadn't been so crazy.... And If i had been a little more original and not just used Chocolate and Nuts like the recipe said. Ultimately the only way to know if you will like it, is to try and make it yourself. Its pretty fun, and If you check out the blog roll of what other Bakers made, You will be much MUCH more impressed than with mine...

I love Meringue, I kind of wish I had just make meringue kiss cookies like my mom makes instead of putting it in the bread (because it disappears anyway, and you kind of feel like you wasted a bunch of time beating the egg whites into submission
The filling, on top of the meringue, on top of the rolled out dough.

Rolled into a wreath for the 2nd Rising... I took the advise of some other bakers on the Forums and didn't cut into the thing until after the rising
After the 2nd Rising, with the wash on top, and the slices slashed into the dough (use a SHARP knife!)
After baking... I should have put the blinds down, the lighting is horrible... sorry about that

I also made a braided one...

Which was my favourite one. I think it tasted better, and everything stayed cleaner because nothing leaked out.

I think it may have been prettier if I had used more chocolate.


I would like to thank Jamie and Ria for a great Challenge. (and you can follow the links to their blogs if you want)


This is how Ava sleeps while I bake... Well, this is how Ava sleeps most of the time actually. I wish I could get as comfortable as she does


I'm going to try and be back later today, I need to clean off my memory card so I can put more pictures on it, and I might as well post them here before I move them to my external hard drive and completely forget about them.

Enjoy the weather... unless you live around here... Then stay inside, We are in another snow storm... Is spring ever going to start to show up?

Saturday, March 26, 2011

Cinnamon Buns!


Cinnamon Buns just might be my favourite comfort food. Whenever my mom would make cinnamon buns, I always got to make the cinnamon sugar and spread it on the rolled out dough. She let me try and roll the dough out too, But I would always get mad that I couldn't get into a rectangle.
I Love my mom's cinnamon buns, but honestly, the bun part is kind of boring. It is a bread machine recipe from a bread machine she no longer owns. Plus, making dough is easy... So i went on a hunt for a cinnamon bun dough that i liked, and I think I finally found it!

I followed the recipe from HERE almost exactly... So you should go there to check out the beautiful photo's she has. http://sweetapolita.com/2011/03/cinnabon-style-gourmet-cinnamon-buns/

I did have to change a few things... And I learned a very basic lesson also... Before making Cinnamon Buns... Make sure you are not going to run out of Cinnamon. (or milk for that matter)
Also, I just used All purpose flour, because I don't have any bread flour to add, and I used Butter instead of Margarine, because I like cows more than Canola... Cows don't produce pollen that makes me want to die and my throat try and close up.... (I'm not allergic to Canola.. just the pollen that it makes... btw, I'm not looking forward to spring/summer around here... Also, Canola plant's stink... worse than stink weed... worse than skunks... worse than towels when you forget about them in the washer and they sit there for a few days not that i would know *shifty eyes*)
ANYWAY onto the Buns...

Cinnamon Buns with Cream Cheese Frosting

Dough:

1 (1/4 ounce) package dry yeast

1 cup warm whole milk (I used 2%... and had JUST enough for the recipe)

1/2 cup granulated sugar

1/3 cup margarine (I used Butter)

1 teaspoon salt

2 large eggs

3 1/4 cups all-purpose flour

3/4 cup bread flour (I used all AP flour)


Filling:

1 cup light brown sugar

3 tablespoons ground cinnamon

1/3 cup margarine (I used Butter) - Softened


For the Dough:
Warm the milk, then sprinkle yeast on top and let dissolve (about 10 minutes)
Add in all the ingredients except the flour into the mixer with the dough hook and beat at whatever speed you feel works for you (would probably be better to have used the paddle attachment for this part, and then switched to the dough hook after)
Add in the flour 1/2 cup - 1 cup at a time until formed into a smooth but slightly sticky dough.
Also, (if you have enough cinnamon... sprinkle a bit of cinnamon in the dough... That's what my mom always used to do, and it just gives it an extra bit of cinnamon flavour)
put in a greased bowl, covered with a towel and let rise for about an hour... Make sure you let it rise in a warm area (But if it is -40C outside in March where you live too, Then, just turn the oven on for a little bit so its warm in there...just make sure you shut it off and its not Too hot when you put the dough in there to rise.)

Once your dough has doubled in size, punch it down (this is my favourite part of making bread), then roll out to a large rectangle, about 1/4 inch thick... You could make them thicker or thinner, it just kind of depends on your taste.
Spread the softened butter on your rolled out dough, then sprinkle the cinnamon sugar around.


Make sure to leave about an inch on one long side without any butter or sugar on it, so that you get a good seal (this doesn't seem important, but it kind of is, they just seem to taste better when they seal properly)

You can leave an untouched edge on the short sides too, but this just makes the 2 end pieces look a bit weird and have less sugar in them, so just do what you feel is best, since you'll be eating them.... Your counter stays a bit cleaner if you seal the end pieces though.
Roll up the dough tightly, making sure everything stays even.
When you get to the edge you left to seal the dough, pinch to seal and then you can kind of roll the entire log of dough, pushing the ends in so the size of everything is pretty uniform (otherwise your buns will not bake evenly)

Now, cut the log in half... then cut those halves in half, so you have 4 even pieces. Divide each of these 4 logs into 3 pieces, so you end up with 12.


You can either do this with a clean, very sharp knife, or the fun way... with a piece of string. Just take the string, put it under the dough-log, then wrap the string around, and pull tightly. Here is some inspiration

(hehe, you can see my camera's reflection on the knife)

Place the 12 pieces, swirl side up, on a parchment paper lined cookie sheet (or you can make them in glass baking dish... this is my mom's way, but I really like the way they turned out on the cookie sheet... so do whichever is easiest for you). Push them down slightly (so they are all the same height). Cover the tops with a piece of plastic wrap, and then a towel (i use the plastic wrap just so the towel doesn't stick to the buns, and so the buns don't become string and lint collectors)
Let the buns rise for another hour in a warm place (like the slightly heated oven)


Once they have risen, pre-heat the oven to 375 F and then pop them in there for 10-20 minutes until they are golden, then let them cool on a wire rack.


Your house will smell wonderfully like Cinnamon and fresh baked bread,


and If you are anything like me, you won't be able to wait until they are cool, and will be forced to do a "quality assurance" test.


During the 2nd rising (once they actually start to look like cinnamon buns), Make the Frosting:

Cream Cheese Frosting

4 oz Cream Cheese
1/2 cup Butter
1/2 cup Brown Sugar
1 cup powdered sugar (or more if you need to firm it up a bit)
1 tsp vanilla

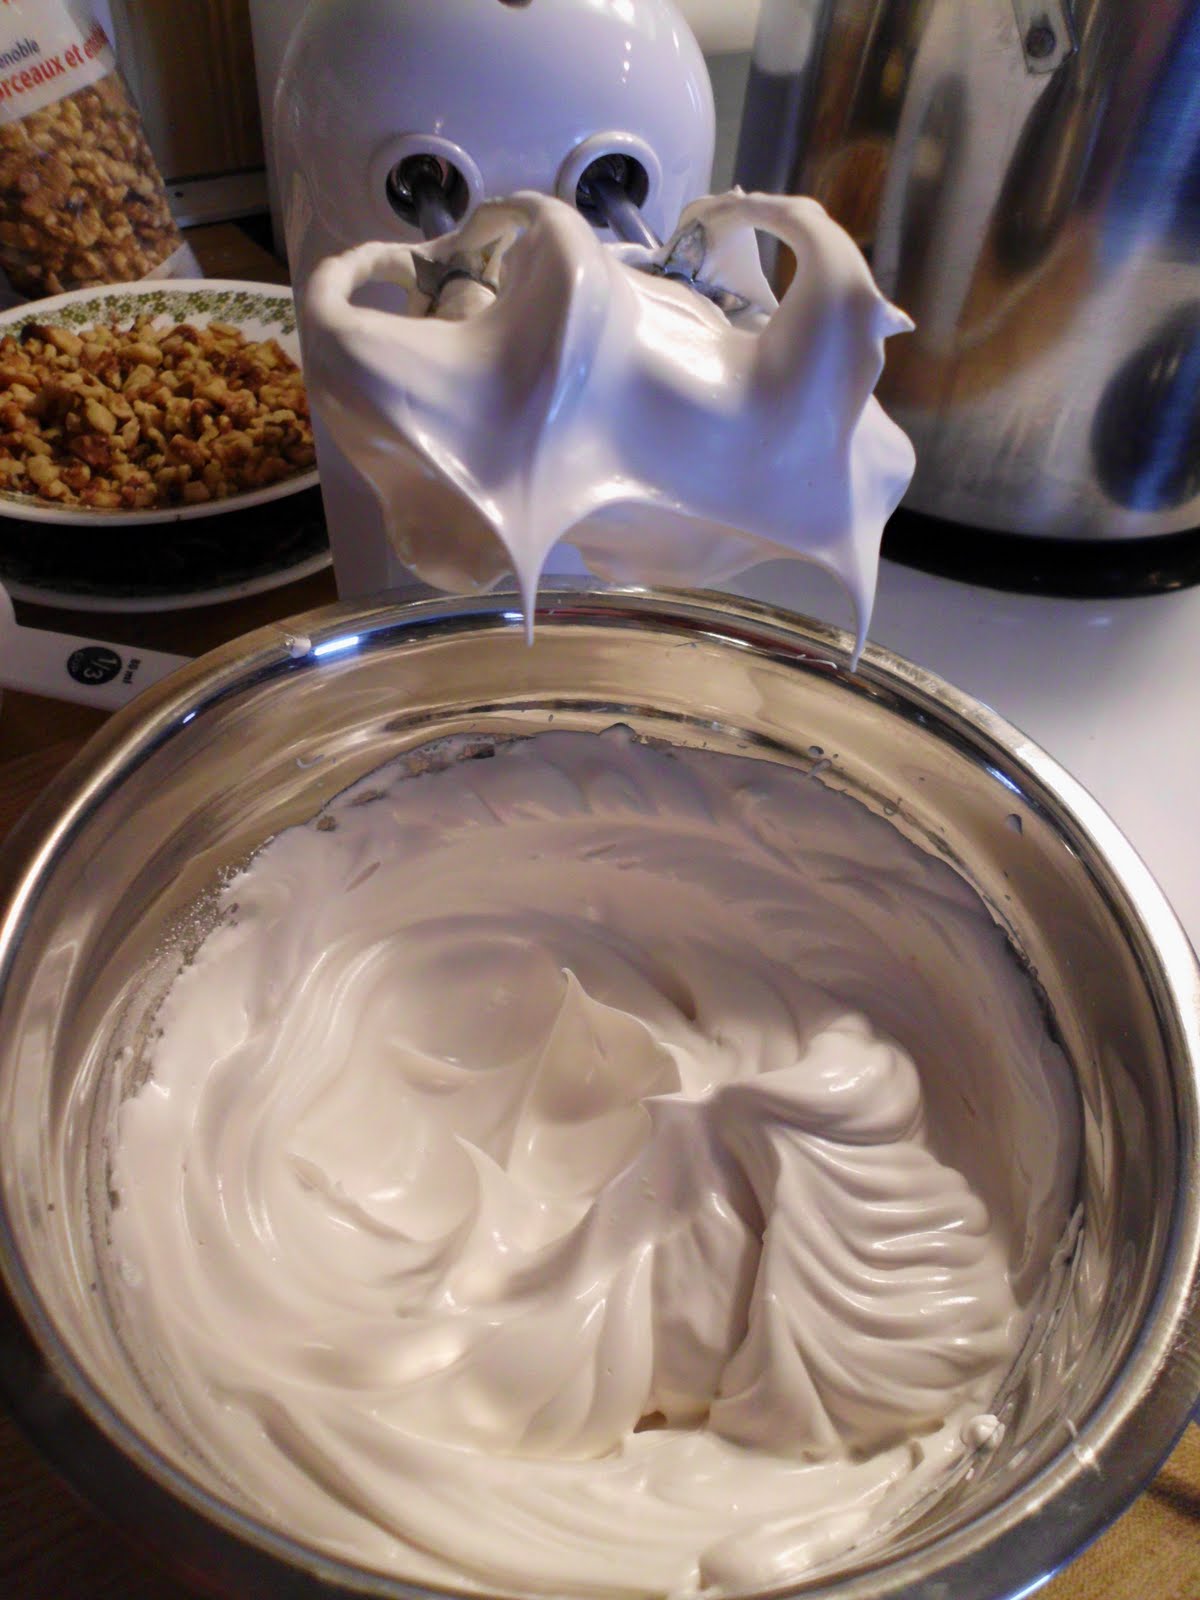
Let the cream cheese and butter sit at room temperature for a while, then beat them together with the paddle attachment of your mixer for about 5 minutes.
Switch to the whisk attachment and beat on high speed for about 10 minutes, slowly adding in the brown sugar during this time
Then add in your powdered sugar (a little bit at a time, unless you like cleaning up icing sugar from every surface in your kitchen), and then the vanilla. If you want/need it a little thicker, add more icing sugar, If you went a little overboard with the sugar, you can add a little water, but i would recommend not having to do this, and just being careful with your sugar additions.
Also, You could follow the Frosting Recipe on the other site, and I probably would've too, but I only had about a cup of icing sugar, and I didn't know until i was already making the frosting, AND I do like the taste that the brown sugar added... AND the colour it added as well.
Let the frosting chill in the Fridge while your buns are in the oven/cooling.

Don't frost the buns too soon, or your frosting will just melt and you will be disappointed that you wasted your time making pretty frosting for your pretty cinnamon buns. Patience is a virtue...


But if you truly can't wait, just taste the frosting with your quality assurance taste test sample... You can eat it before it melts into the bun that way. (see I've thought of everything)


Look at How long those Legs are getting.... 10 weeks old... Wilson can walk underneath her already


-

Soon to come: Cinnamon Buns

Ok, I'm back in the kitchen... (I am on my way right now to make some cinnamon buns)

It's been a miserable few weeks... The weather has been depressing, my iPod was stolen from my car, Ava is nowhere near being house trained (every morning we wake up and have to negotiate a field of puddles and land mines), Because of this, Wilson has taken a downward spiral in the house training department too... The wheel fell off the boyfriends car!!! (thankfully he was pulling into a gas station when this happened and not driving in rush hour traffic on Deerfoot), my grandma is in the hospital with pneumonia again (on top of her already serious-enough lung cancer), and did I mention the weather? My feet are soaked all day long... so while last weekend's goal was to let myself feel sorry for myself and wallow in my own self-pity... This weekend, I am actually going to make a decent attempt to pull myself out of it... I'm washing/drying my work boots right now, and will attempt to water-proof them again when they are dry... And I'm back stalking food blogs and just printed off a stack of recipes to try (and then add to my favourite recipe book)
Cinnamon Buns just feels like the best comfort food to help pull one out of a funk
The only bad part is that I need to negotiate and then clean up the mine field that my darling puppy has left for me

Okay, I'll be back soon with some yummy yummy cinnamon buns! and I promised Boyfriend that I would make those Cappuchino Cookies again from Joy the Baker! (new favourite!)

Sunday, March 20, 2011

uggggg

I have yet to completely pull myself out of the funk I have been in lately...
So I thought that leaving the house might help

I decided to go to the pet store to get Ava a tag for her collar...with my number on it, in case she learns from Wilson the adventure of escaping.

So I go turn my car on, and dig through all the crap in there to find the snow brush

and then i start to notice that my iPod charger cord is not dangling from the glove box

and neither is the FM transmitter for my iPod...

and my glove box is open


WTF!!!

my iPod is gone

and there are random footprints in the snow

AND MY iPOD is gone!

so I check the rest of my car... nothing else is missing

So while I'm pissed that my iPod is gone... whatever scum of the earth who took it... they left all my coffee change, my riding boots, my riding helmet, the tire inflater thingy... and pretty much everything else that actually has value over my iPod that is super scratched, only works sometimes, and has a lot of crappy music on it

its just that it was my crappy music...


and i feel so Violated

and just as crappy, if not more so, than I felt before.

with absolutely no desire to even be in my kitchen, other than the fact i have to go through it to get from outside to the bedroom

Saturday, March 19, 2011

...again...

Again, I'm sorry for the lack of posts
I am out of inspiration for the time being. The one thing I want to do, is the one thing that I can't do (because my car isn't running good enough).
All I want to do it go home (parents "home") and dig my head into my pony's mane and just bawl my eyes out
and I can't even explain why. I just do

But anyway, I'll try and end my pity party for one later and drum up some inspiration to go take crappy pictures of whatever I can figure out to make with the food that is in my fridge, and then post it here.


Ps. I hate being a grown up

Saturday, March 12, 2011

Spiral Spinach Tart


Okay, this thing is SERIOUSLY amazing. You should just ignore everything I am about to write, scroll to the recipe and make it yourself... It's that good (and my writing is that bad).
I originally saw it a while ago on some Food Porn site, and the recipe was in Romanian or something, and the Google Translator didn't translate some words, so it didn't make too much sense. So I just decided to make something that looked like the picture, rather than learning Romanian just to make some spinach tart thing.
Also, watch Due Date... its hilarious (and I'm watching it again right now)


1 Package Frozen Puff Pastry (Like Tenderflake)
1 Package Frozen Spinach (chopped or whole leaf, it doesn't really matter... although Chopped might be a teeny bit easier... OR use Fresh... just make sure you wash it really well)
2 gloves of Garlic (minced)
Fine-grated cheese...(I used marble, but whatever you want. Amount needed depends on how much you like cheese... I grated a bunch and then kept the grater and cheese out and easy to grab if I wanted more)
Seasoning (I used a little seasoning salt and some garlic powder)
Flour for dusting
Spring form pan


Start with the spinach... Defrost (if using frozen), then squeeze as much of the moisture out of the spinach as possible (with your hands). Add the minced garlic to the spinach, and mix together with a fork. Add in whatever seasonings you choose.
Pre-grate your cheese too.
On a lightly floured surface, Roll out the puff pastry to a thin-ish rectangle
Then cut the rectangle into long thin rectangles

Put spinach mixture and then cheese , Roll up like a snake. (you can see completed "snakes" in the back of the photo)

Arrange the "snakes" in a spiral in the Spring form pan. I forgot to take a photo of the spiral before I put the cheese on top, But I start in the middle of the spiral and work my way out. Then press everything together in the pan with your hand.

Bake at 350 F for about 15-30minutes. (i forgot how long it was in there). Basically until the puff pastry is lightly browned and golden.


Let cool for 5-10 minutes and then move from the spring form pan to a plate.


ENJOY!!! It is delicious fresh from the oven, or later on, once it is cool.


The Spinach "snakes" really show up too:

Tuesday, March 8, 2011

...

I promise im working on new posts... I'm just busy making decisions in real life which sucks, can I just go back to being a kid and playing with my horses all day long?

Sunday, March 6, 2011

My Cooking/Baking Bucket List

This is a list of all the things I want to cook or bake before I die. It is going to adapt and change as time goes on... As I cross things off the list, and find new and interesting things that I want to try. I will try to keep it updated also.

1. Vinatarta      (Completed here!!! )
2. homemade granola
3. Gingerbread cupcakes
4. Pull-apart bread (that actually pulls apart)
5. Julia Child's Boeuf Bourguignon

6. Baked Alaska
7. Horse cupcakes (like in Hello, Cupcake)  (COMPLETED!!!)
8. Guinness Cupcakes like here
9. Ratatouille (Completed here)
10. Cornish Pasty (Completed here!)
11. Focaccia Bread
12. Apple Butter
13. homemade Marshmallows  (Completed Here!!)
14. Hasselback Potatoes
15. Chinese Dumplings
16. Creme Brulee
17. Chocolate Zucchini Cake
18. Black Forest Cake (completed!!! April 10/2011)
19. Chocolate Lava Cake
20. Pavlova
21. Croissants   (completed!!! September 2011... Thank you Daring Baker Challenge!!!)
22. Old Fashioned Pie (the kind without a pie plate)
23. Roast a Butternut Squash
24. Swiss Cake Roll  (Completed Gluten free version HERE)
25. Black Bottom Muffins (Completed here)
26. Italian Wedding Soup
27. Spinach Spiral Tart  (Completed Here)
28. Chicken with 40 cloves of Garlic (Completed here)
29. Marble Rye Bread
30. Sourdough Bread (make my own starter also) (Completed here)
31. Clam Chowder
32. Perogies
33. Cabbage Rolls
34. Baked Potato Soup
35. Chicken Pot Pie
36. Sponge Toffee  (Completed!!)
37. Learn how to make (and Can) Jam    (Ta-Da! Completed Here)
38. Pickles (get grandma's Recipe)
39. Grandma's Anti-pasto
40. Yorkshire Pudding
41. Minestrone Soup
42. Spinach/Artichoke/Crab Dip  (Completed!!)
43. Strawberry Shortcake
44. Dog Treats
45. Biscotti
46. Pesto
47. Pumpkin Pie  (Completed here..)  next goal is to make the pumpkin puree myself
48. Angel Food Cake  (COMPLETED!!!!)
49. Pumpkin Bread
50. Moussaka
51. Beef Jerky
52. Smoked Salmon
53. Make my own Nut-Butter (Completed Here!)
54. Epic Rainbow Cake
55. Pioneer Woman's Knock You Naked Brownies
56.  Joy The Baker's Vegan Avocado Chocolate Cake
57. Joy The Baker's Chocolate Beet Cake!  (Completed... twice, but I haven't written about it here just yet) 
58. Swiss or Italian Meringue Buttercream Icing stuff (yum)
59. Tomato Soup Cake
60. Coca-Cola Cake

There will be more to add soon...

Saturday, March 5, 2011

Cappuccino Cookies

Busy morning in the Kitchen... with 2 doggies underfoot now.... wanting to know what I'm making, and when they are going to get to taste it.
Isn't she cute??

Anyway... Last night I found this recipe on Joy the Baker's Blog... I made it this morning (along with Chicken Soup Stock that i was inspired to make at my friend Erin's Blog: A Tale of One Foodie's Culinary Adventures) And I'm going to share it with you now. It is amazing! I've had 3 already, and I think I might have to hide them from myself.
The best part is that they include one of my most favourite flavours: Coffee


Cappuccino Cookies
(from Joy the Baker)

1 cup Butter - softened
3/4 cup Brown Sugar
3/4 cup Granulated Sugar
1 egg
1 egg yolk
2 tsp Pure Vanilla Extract
2 1/4 cup All Purpose Flour
1 tsp. Baking Soda
1 tsp. Salt
3 TBSP instant Coffee powder
1 cup White Chocolate Chunks


Whisk flour, baking soda, salt and coffee powder together

In the bowl of a stand mixer (with paddle attachment) Beat together the butter and sugars until Light and fluffy. Scrape down the sides of the bowl with a spatula and then mix in egg, egg yolk and vanilla. Beat until light and fluffy.

Add in Dry ingredients all at once with the mixer at low speed (or else your kitchen (and you) will be covered in flour), until just combined.

Fold in Chocolate with a spatula until well combined.

Cover bowl with plastic wrap and place in the refrigerator for about 45 minutes.

Preheat oven to 350 F, and line cookie sheets with parchment paper

Drop by heaping tablespoons onto cookie sheets and bake for about 10-12 minutes. Just until the edges are lightly browned.

Wait until the cookies set up enough so you can transfer them to a wire rack to continue cooling.
(except for the one quality-control taste test... my personal favourite part of making cookies)

Friday, March 4, 2011

Roasted Chicken with 40 cloves of garlic

Tonight, to celebrate the fact that it is finally the weekend again, I'm roasting a chicken.

Weekend equals:
a)time to cook real food,
b)sleeping in,
c)energy to cook real food,
d)all of the above (and more!)

I am doing this for a few reasons. First of all, I found a couple amazing-sounding recipes for Chicken roasted with 40 cloves of garlic. Secondly, garlic was on super-sale or something at the grocery store the other day, and last night, I found 2 whole chickens for $12.... TWELVE dollars for TWO WHOLE CHICKENS.
So now, one of them is being roasted... It's little buddy is sitting in my fridge until i decide what to do with it... But honestly, its probably going to get roasted too.

This is the blog that started my 40 cloves of garlic Roasted Chicken recipe quest. So i feel like i need to include it... This one and Martha Stewart were my main resources... And previous experience.


Roasted Chicken with 40 cloves of Garlic

1 Whole chicken
4-5 Potatoes
3-4 Carrots
1 onion
1 lemon
40 cloves of garlic
Fresh Parsley
Fresh Rosemary
Fresh Dill
Salt/Pepper/Seasoning
Olive Oil
2-6 TBSP Butter (cut in small pieces) (amount depends on preference, and size of chicken)

Wash out the chicken, and pat dry with paper towel. Rub inside and outside with salt and pepper. I have a chicken seasoning salt that I used - but regular salt works just fine too (i like the course sea-salt).

Slice the potatoes really pretty thin. Carrots pretty thick, and Onions thin-ish so they are in rings. In fact, probably about the same thickness as you would want for onion rings.
Put the above vegetables in a large bowl, drizzle with olive oil to coat, and then add some seasoning salt, and whatever dry herbs you would like, shake up, then use these to line the bottom of your pan. I don't have an actual roasting pan right now, so I am just using my large glass baking dish


Prepare your herbs/garlic: I like to cut of the bottom part of the clove to help get the skin off... There are other ways, but this is my favourite. Use whatever works for you, because it is a lot of de-skinning of garlic in this recipe (obviously). I zested the lemon, and then stabbed it a few times with a knife to help let the juices infuse into the chicken. I also used some fresh parsley, dill and rosemary.

Once everything is ready, Preheat the oven to 400 F (or anywhere between 375-425, depending on your preference)


Put the chicken on top of the potato/carrot/onion bed


Finely slice a few cloves of garlic, and put them under the skin of the chicken Breasts, along with the lemon zest, and a few small pieces of butter. Put some of the herbs and a few garlic cloves into the chicken cavity. Add in the whole Lemon, and more garlic until the cavity is full. I kept the majority of my herbs in the cavity... Only the Rosemary was used on top of the potato/carrot/onion bed for flavour/aroma.
Whatever garlic you can't fit inside the chicken, stuff into crevasses on the chicken - like in the thighs or wings... You can also put them under and on the side of the chicken. Try to get most of them inside the chicken though.


Basically, that is the extent of the work. Now you just put it into the oven until done... Make sure its not raw inside, But basically, at this point, you just need to cook it to whatever done-ness you prefer.... My meat Thermometer says that Poultry should be cooked to at least 165 F... see:


Personally, being raised by my mom, a self-confessed over-cooker. I like to make sure it is done, and take it out when the meat is practically fall-off the bone. Some people might not like this, but I do, and I like knowing that I'm not getting Salmonella.


I LOVE this chicken. Light and juicy and not at all dry! The chicken skin is even good, and i hardly ever like the skin.


Above: the chicken carcass... because tomorrow, I am going to try my hand at making Chicken stock... Inspired by my old pen-pal... Go check out her blog!!!

This photo was the Boyfriend's Idea... "It's so good, you should take a picture of the end too"
I <3 him so much!!!